Testing for Tristar charging issues
Have an iPhone that won't charge? This can be caused by a number of things including but not limited to: charger port, battery, tristar, and liquid damage.
The Tristar normally fails after using bad cables, or external accessories such as a usb iphone mini fan.
In this article we will assume all the basic parts have been swapped out and tested to be known good with all that's left being at fault is a board component issue, typically being what’s known as the tristar ic. (1610A3)
To test for tristar issues without opening the device use this tool: https://amzn.to/2QjDEej

How do you test to check if the tristar is the culprit?
Let’s dive in, in this case we will be showing the before and after with an iPhone 6, although the process and values are typically very similar in other iPhone models.
In order to determine if the Tristar IC is functioning properly, test the voltage of the battery---after you confirm that the phone is pulling amps using the ammeter
1) Test the charger port using the ammeter, typically charging values are between 0.80-1.6A. Note: Values for the amperage may be between 0.1-0.2A if the battery is dead or full, due to trickle charging. If the phone is pulling 0 amps or a very low value (<0.1A) you should dry fit a charger port and test again.
2) Test a new battery as well if there is still no response with a new charger port.
3) If neither of the above works, test the battery connection on the board:
Turn the Multi-meter voltage (V-DC) with a 20 unit scale.
Using the DMM (Multimeter) set the black probe on a ground location such as the SIM tray and place the red probe on the left-most battery terminal of the J connection on the board.
To gain access to this, first remove the screen, then remove the metal shield covering the charger port plug and the battery port FPC connector(flexible printed circuit).

As we can see in the above picture, when checking the voltage at the battery terminal we are presented with .69 volts. This is typical for a damaged tristar. Although it’s important to note that the exact value shown will be different depending on chargers, cables and the problems with the tristar. Typically though anything less than 2 volts is enough to warrant a replacement of the ic.

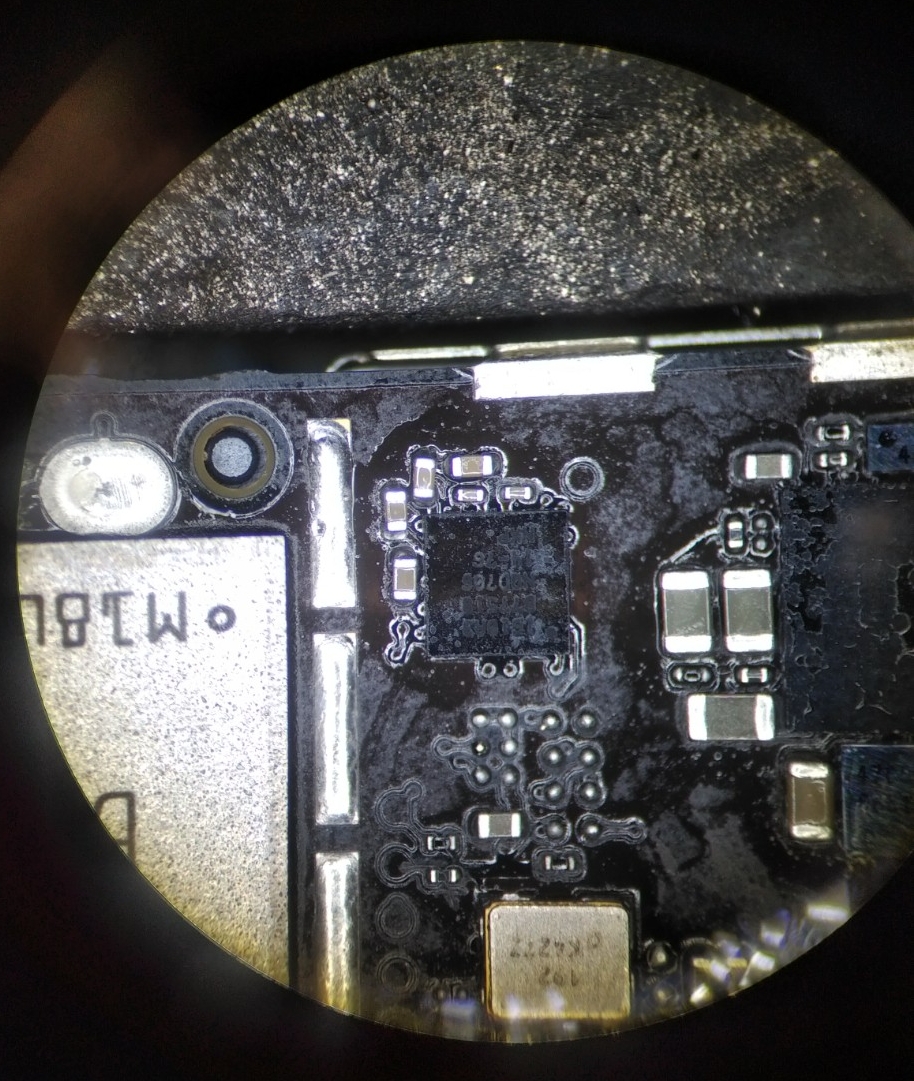
Virgin Tristar
As we can see once the shields are removed the tristar is covered in a thick putty known as "underfill"
This is meant to protect and shield the ic from light, heat, liquid and vibration(s)
To replace the tristar we need to lightly heat up the chip and soften the this underfill that surrounds it.

underfill removed.
Removing the undefill, allows us to easily remove the tristar without pulling any pads or nearby components.

Tristar ic removed
Once the tristar ic is removed we need to prep the pads on the BGA (ball grid array) to accept another replacement chip.
replacement tristar
Once the replacement tristar is installed we can then go ahead, re-assemble the motherboard into the housing and check the voltage with a DMM to ensure the new chip is pulling proper current.

checking for proper voltage at battery terminal
After the tristar is replaced we can see current at 3.99v which is normal and much better than the previous 0.69v

Once the phone is fully reassembled and everything re-connected we also get .86A with a ammeter and then it charges and fully boots. The repair has been successful and full functionality of the device has been regained.